iPhone and iPad Support
Below you will find a list of tutorials to help you
setup your Tysoft software on either your iPhone or
iPad.
Installing the software on your
iPhone or iPad
|
To install the software on your iPhone
or iPad simply tap on the App Store
icon on your devices main screen. The
App Store will then be loaded. Now
click the Search button on the bottom
toolbar and enter tysoft and tap
Search. |
 |
|
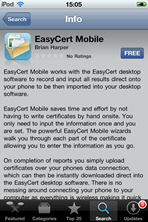
The App Store will then display
all Tysoft products. Simply select the one
you want to install to your IPhone or IPad.
Now tap on the FREE button to start
installing the application. |
 |
|
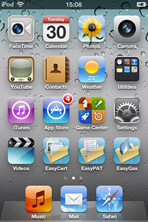
Once the application has been installed
the icon will be displayed on your IPhone or
IPad as shown opposite. |
 |
Activating the software on your
iPhone or iPad
|
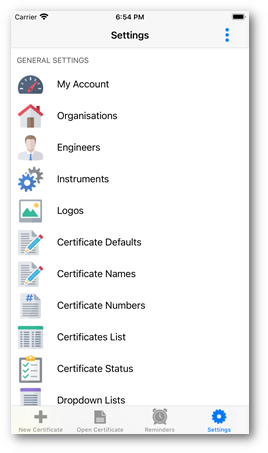
You must activate your software to send
and receive certificates between your
desktop software and your iPhone or iPad. To
activate your software click the Settings
button on the bottom toolbar and then tap
the My Account item. |
 |
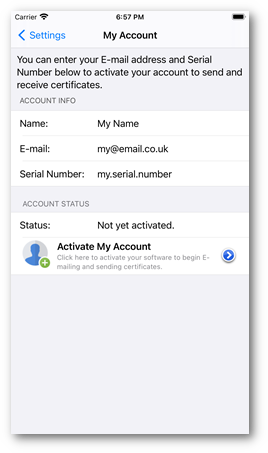
Within the My Account window enter your
name. You can then enter your E-mail address
and serial number. Your serial number will
have been issued to you when you purchased
the software.
You must enter your E-mail address and serial
number exactly as stated in your order
E-mail otherwise an error message will be
displayed.
Now click the Activate My Account
button to continue. |
 |
|
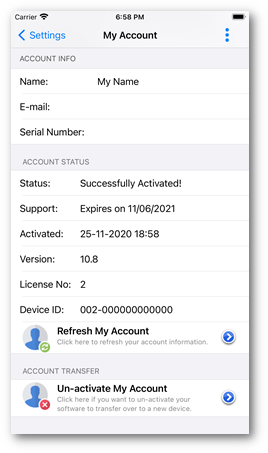
Once your iPhone or iPad has been
successfully activated your account details
will then be displayed as you can see in the
picture below. |
 |
Exporting
certificates from your IPhone or IPad to your desktop
software
You can export certificates from your
iPhone or iPad by using your devices data
connection to send certificates to the
shared certificate system. No cables
or USB connection is required to transfer
certificates between your device and your
computer.
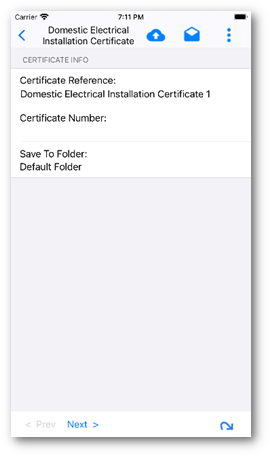
Simply create a new certificate in the
software or open an existing certificate.
Now click the Options button in the
bottom right corner. |
 |
|
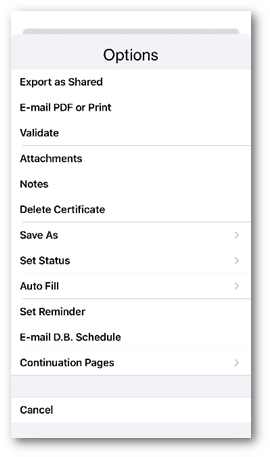
The options menu will then be displayed
from which you can select the Export
as Shared item as shown below. |
 |
|
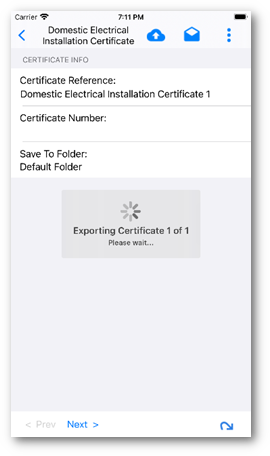
The certificate will then be exported to
the shared certificate system using
your devices data connection. |
 |
|
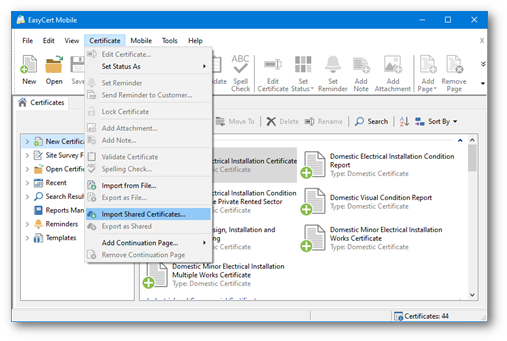
You can then load your desktop software
and select the Certificate menu >
Import Shared Certificates. |
 |
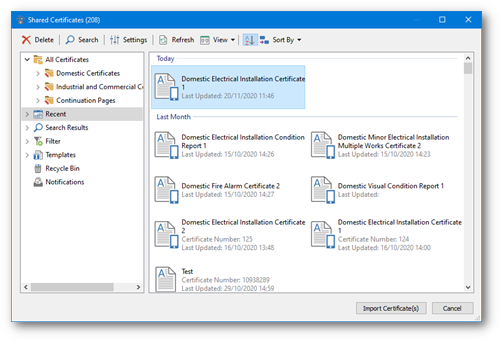
The Shared Certificates window
will then be displayed that lists all
certificates that have been exported from
your IPhone or IPad.
Simply select the certificate you want and
then click the Import Certificate
button at the bottom right to import the
certificate into your desktop software. |
 |
Exporting certificates from your
desktop software to your iPhone or iPad
You can export certificates from your
desktop software to your iPhone or iPad by
using shared certificate system. No
cables or USB connection is required to
transfer certificates from your desktop
software to your device.
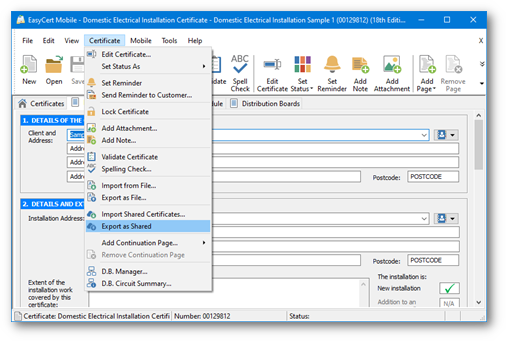
Simply create a new certificate in the
software or open an existing certificate.
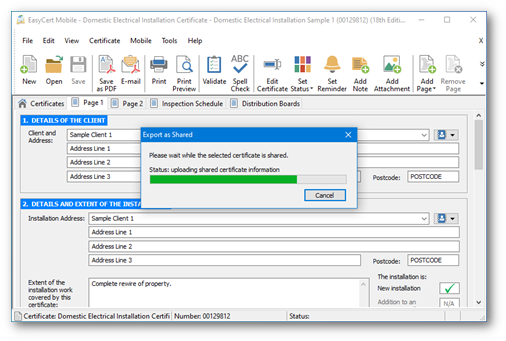
Now click the Certificate menu >
Export as Shared. |
 |
|
The certificate will then be exported to
the shared certificate system. |
 |
|
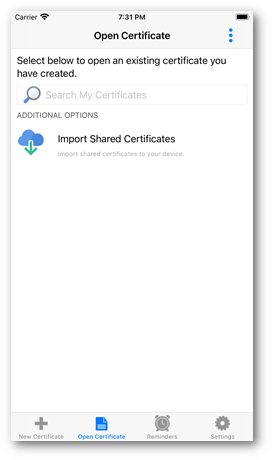
To import the certificate to your device simply tap the Open Certificate
section and scroll to the bottom of the
certificates list. Now tap the Import
Shared Certificates item. |
 |
|
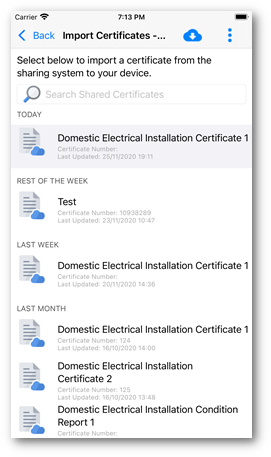
The list of certificates on the shared certificate system will then be
displayed. You can select the certificate
you want to import and then tap the
Import Certificate button at the top
right corner. |
 |
|
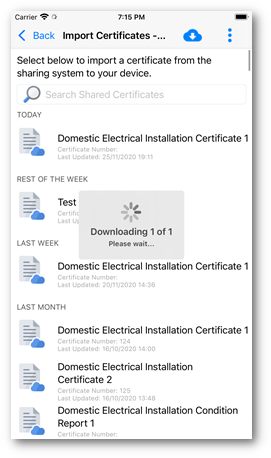
The certificate will then be downloaded
and imported to your iPhone or iPad using
your devices data connection. |
 |
|
|
|
