 |
 |
 |
| |
| |
Cloud Server Database
You can use a cloud server database hosted by Tysoft and have all your certificates stored within the cloud. With this option you don’t have to use an onsite server within your office and can access your certificates from any desktop or laptop connected to your account at any time.
Some of the advantages of using the cloud server are
listed below:
 |
Certificates saved to the cloud -
Certificates are saved to the cloud and can be accessed by
all users |
|
|
Attachments saved to the cloud - Any
photos attached to certificates are stored within the cloud |
|
|
Settings saved to the cloud -
Application settings are stored within the cloud including
organisations, engineers and signatures, test instruments,
and also logos |
|
|
Automatic backups - Never lose your certificates again as
backups are done automatically |
|
|
Certificate save points -
Overwritten a certificate by mistake? No need to worry as
you can restore back to a previous save point (Coming soon!) |
If you have an existing database just let us
know and we can migrate this over to the new cloud
server for you.
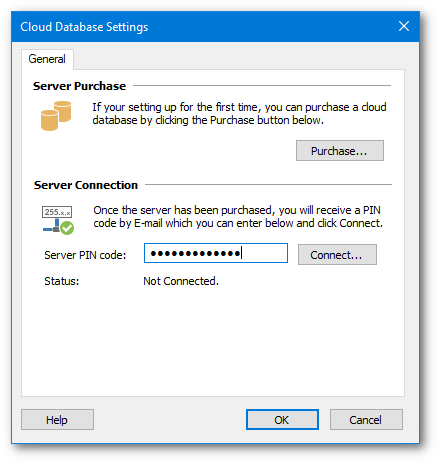
If you haven’t already done so, you will first need to purchase the server using the purchase options below. Once the server has been purchased
we will contact you by E-mail to migrate your existing
certificates over to the new server. Once this has been
completed you will then receive your PIN code to activate the server and begin using it.
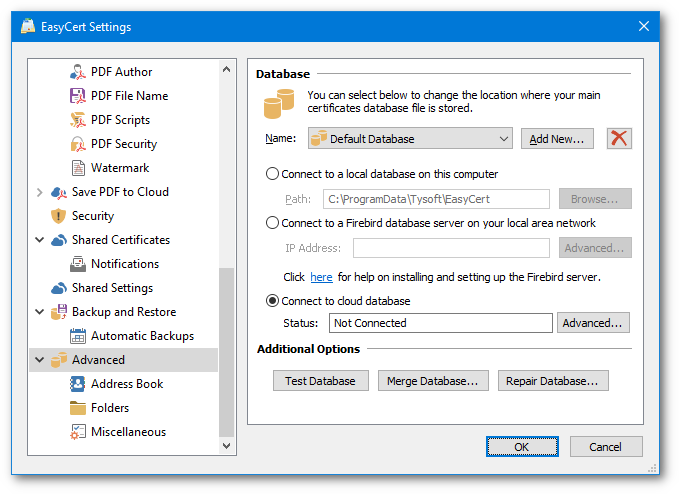
Follow the guide below on how to connect to the cloud server database once it’s been purchased.
Please note an internet connection is required at
all times to use the cloud server database.
|
|
|
|
 |
|
 |
|
|
|
|
 |
Shopping Cart |
|
|
|
|
|
|
|
|
|
|
|